External SIM Configuration
Follow these steps to configure an external SIM. Please ensure that all requirements are met before starting the installation.
Preparation & Requirements
- External SIM Card: Ensure that your external SIM card is in nano format and uses an APN1 that does not require authentication. Only APNs without a username and/or password are supported. If you do not know the APN settings for your SIM card, contact your mobile network provider for assistance.
- Mobile App: Download and install the application Senscape Mosquito Viewer from the Google Play Store.
- Device Compatibility: Your mobile device must support Bluetooth Smart Ready 4.x Dual Mode (Bluetooth Low Energy, BLE).
- Signal Strength: Verify there is strong LTE/2G coverage at the installation site.
- Power Supply: Ensure a stable and reliable power supply is available during the process.
A strong signal is very important, as firmware updates involve significant data transfers and typically take between 5 and 20 minutes to complete. If coverage is poor, the update process may take much longer or may fail due to timeouts.
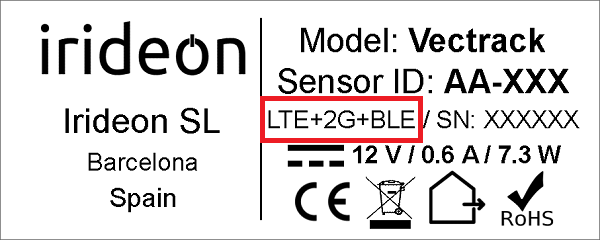
Before proceeding, ensure that the device supports LTE + 2G + BLE. To confirm this, refer to the device identification label.
Connection Steps
Follow these steps to configure and connect your sensor.
Phase A: Insert External SIM
- Prepare Device: Disconnect the sensor and place it upside down.
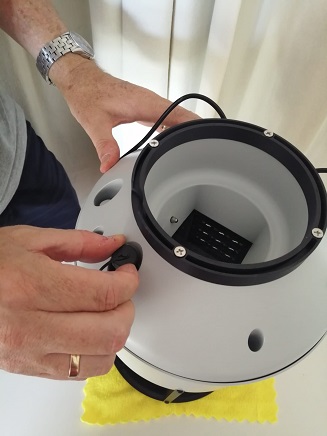
- Open SIM Holder: Unscrew the cap of the external SIM holder.
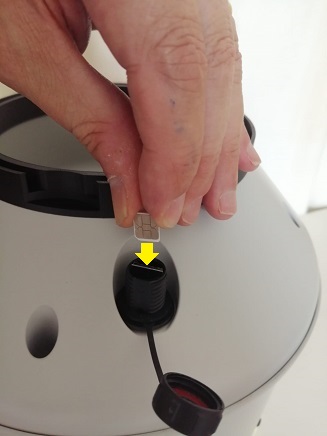
- Insert SIM Card: Insert the SIM card until it clicks into place.
- Close SIM Holder: Screw the cap back on.
Phase B: Entering Configuration Mode
- Toggle Power: While keeping the sensor upside down, turn it ON and OFF repeatedly until the LED shows a pattern of three (3) flashes.
- Restore Position: Disconnect the power and return the sensor to its original (upright) position.
Phase C: Firmware Initialization & Pairing
- Power On: Turn the sensor back on.
- Golden Image Download: The LED will flash rapidly for approximately 30 seconds.
- BLE Connection Window: Wait until the LED becomes solid (fixed).
You have 30 seconds to connect to the sensor via the mobile app. If the connection is not established, restart the sensor (OFF/ON) to retry Phase C.
Phase D: APN Configuration
Follow the instructions in the mobile application:
-
Open the SensViewer app and log in with your username and password.
-
Tap the menu icon (three horizontal lines) at the top left to access the main menu.
-
Select the Bluetooth option.
-
Tap Scan to find the sensor. Make sure Bluetooth is enabled in the app settings.
-
Once the sensor is discovered and connected via BLE (Bluetooth Low Energy), proceed with configuration.
Step 1 - Login
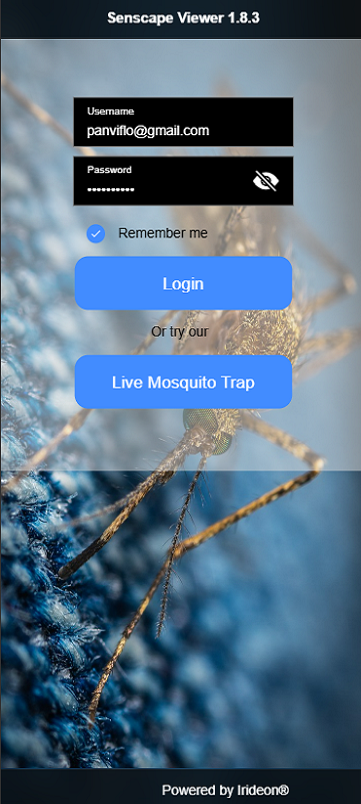
Open the SensViewer app and enter your username and password.
Step 2 - Menu Access
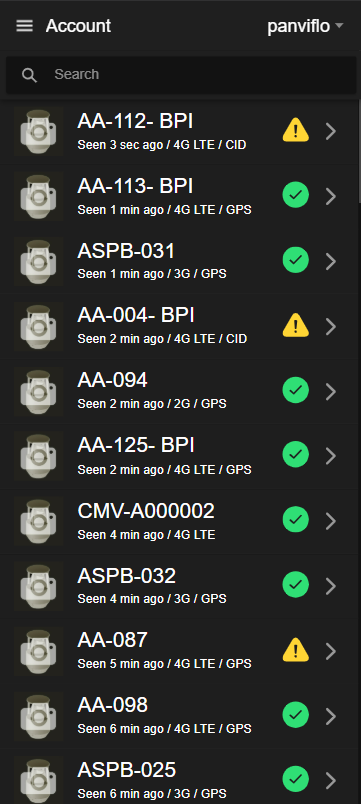
Click the three horizontal lines menu icon at the top left to access the main menu.
Step 3 - Bluetooth Selection
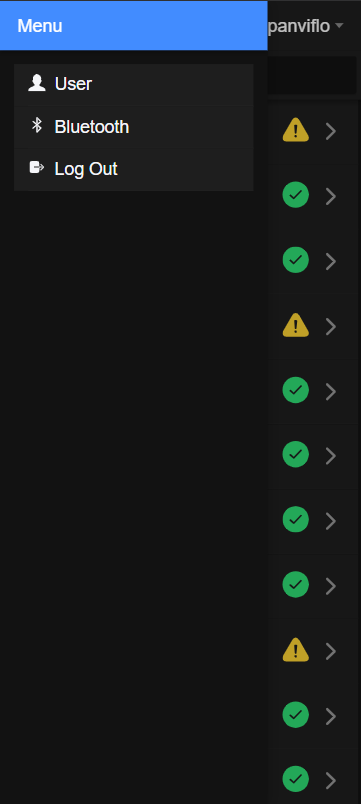
Select the Bluetooth option.
Step 4 - Scan Sensor
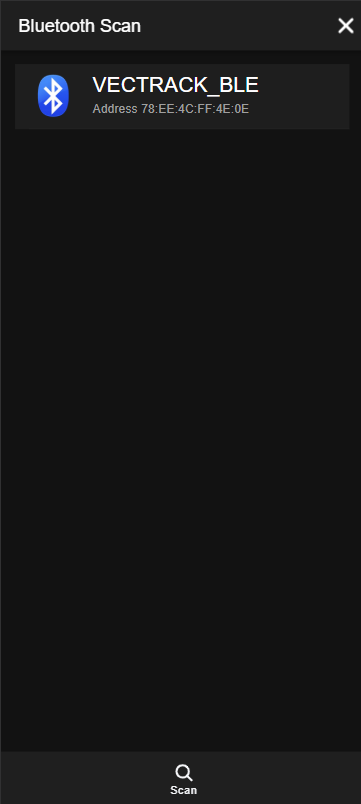
Tap "Scan" to find the sensor.
Make sure Bluetooth is turned on within the app settings.
Step 5 - Configure APN Setting
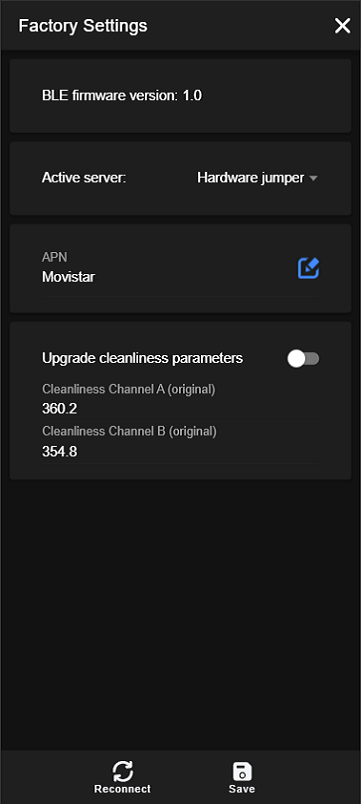
Once the sensor is discovered and connected via BLE (Bluetooth Low Energy), proceed with the following steps:
Edit APN: Enter the new APN (Access Point Name).
Save Settings: Tap the "Save" button. The app will confirm once the changes have been successfully applied.
You have a maximum of 10 minutes to complete this operation. If the time expires, you may need to restart the process.
Phase E: Network Connection & Final Update
- Network Synchronization: After saving, the LED remains solid while connecting (up to 1 minute).
- If it stays solid too long, restart the process and verify credentials.
- Firmware Update: Once connected, the LED blinks (1 flash per second) while downloading firmware.
- Installation: The LED flashes rapidly during installation.
Once the update process has been initiated, the device will automatically retry the firmware update approximately every 30 minutes if an error occurs. In some cases, multiple attempts may be required before the update completes successfully. If the firmware update has not been completed within 24 hours, move the sensor to a different location and repeat the entire external SIM configuration process.
Do NOT power off the sensor during the update process.
Phase F: Success & Final Activation
- Active Mode: Upon completion, the LED flashes once every 5 seconds, indicating normal operation.
- Verification: The sensor will generate 15 test signals, which will be sent to the server within 5 minutes.
Server Verification
To confirm the installation was successful, follow these steps:
- Access the Dashboard: Access the platform through the mobile app or directly from the web dashboard at sensviewer.com.
- Login Credentials:
- Username: [your login]
- Password: [your password]
- Status Confirmation: Within 5 minutes, you will receive a status message on the server confirming that the device is online and reporting data.
The first communication after recovery may take a few minutes while the sensor establishes the network connection and completes the initial data transmission.
LED Status Reference
| Signal | Meaning | Action |
|---|---|---|
| 3 Rapid Flashes | Reset Successful | Flip upright and power on. |
| Fast Blinking | Image Downloading | Wait ~30 seconds. |
| Solid (Fixed) | Pairing / Connecting | Connect via App within 30s. |
| 1 Flash / Second | Downloading Firmware | Wait for download. |
| 15 Beeps | Connection Success | Verification in progress. |
| 1 Flash every 5s | Operational Mode | Sensor is ready for use. |