Overview Screen
Purpose
Provide a centralized dashboard for monitoring deployed sensors and mosquito capture activity within the selected account.
Description
The Overview Screen is the main dashboard of the SensViewer platform and the primary entry point for monitoring and managing the selected account. From this screen, users can monitor deployed sensors, mosquito capture activity, sensor locations, and system alerts, switch between accounts and monitoring projects, and access user management, documentation, and support resources.
Main Components
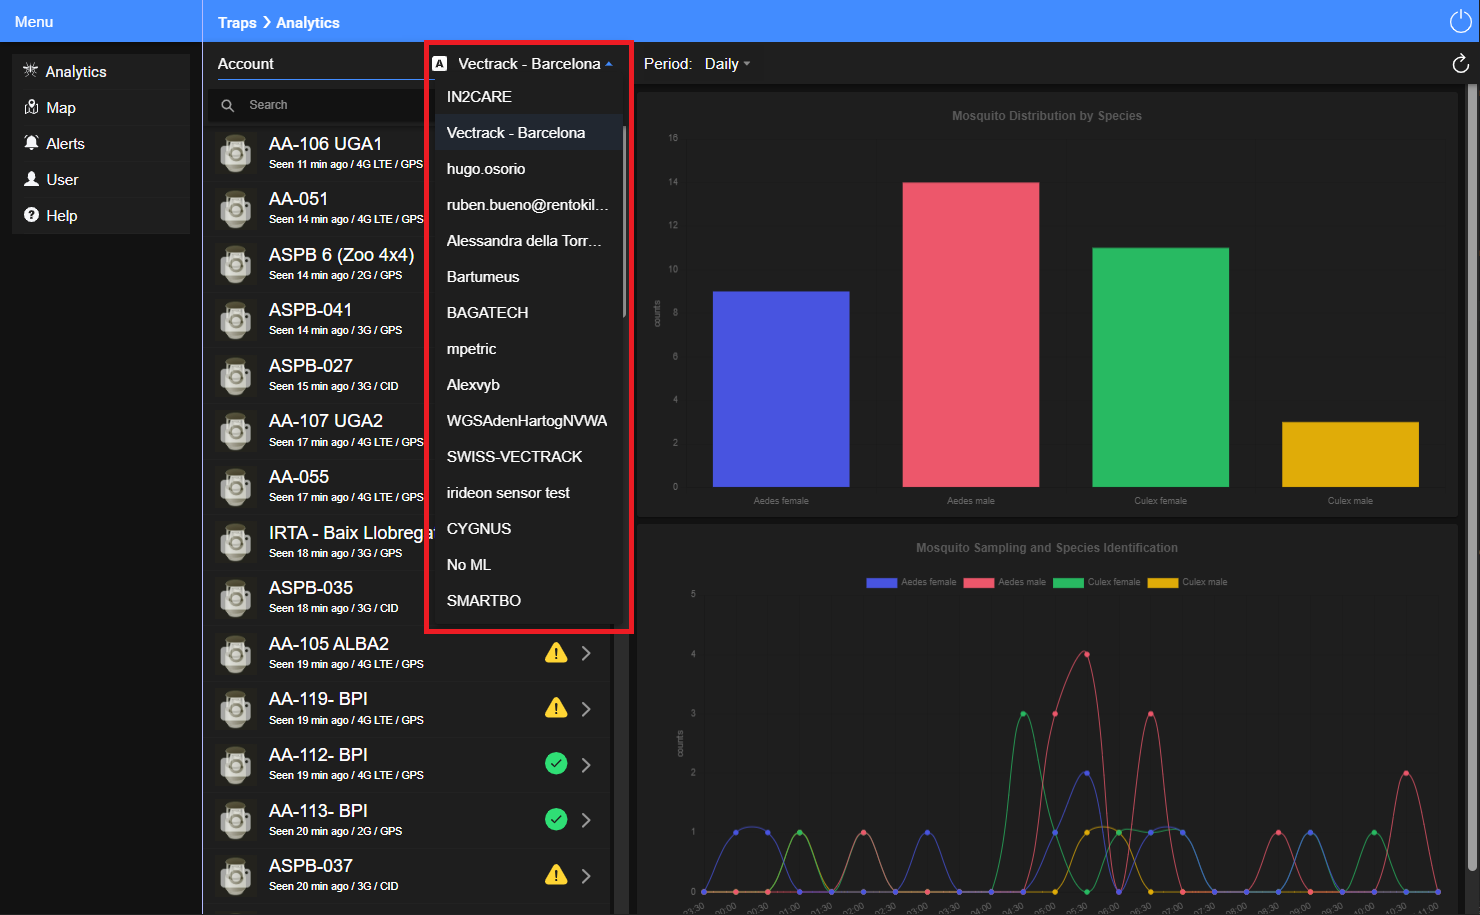
- Account / Project Selection Menu: Allows users to switch between accounts and monitoring projects they have permission to access.
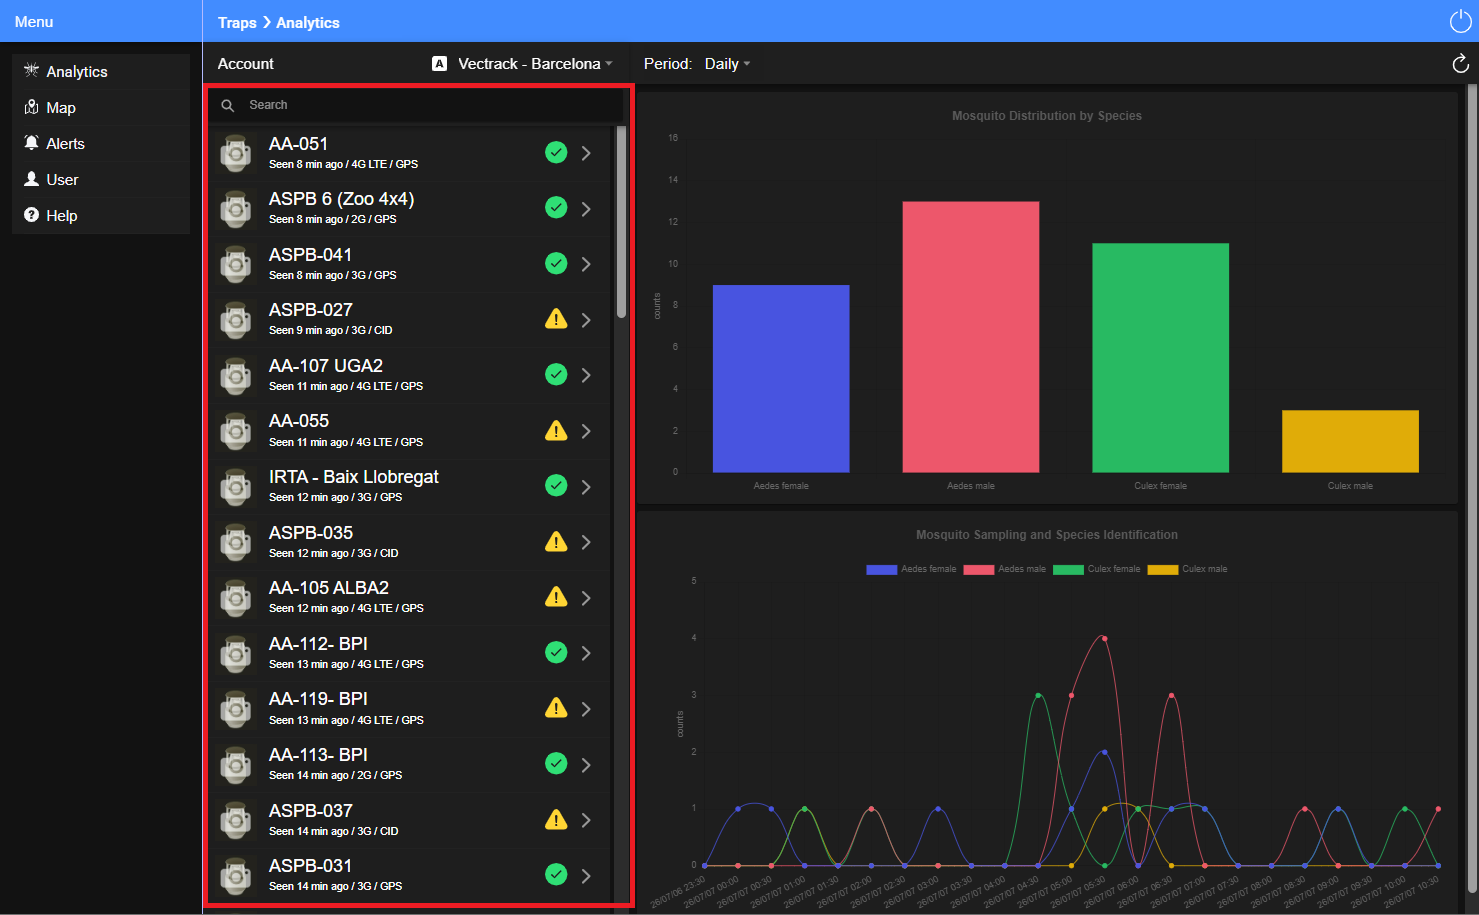
- Sensor List: Displays all deployed sensors in a list-based view, including their location, operational status, and connection status.
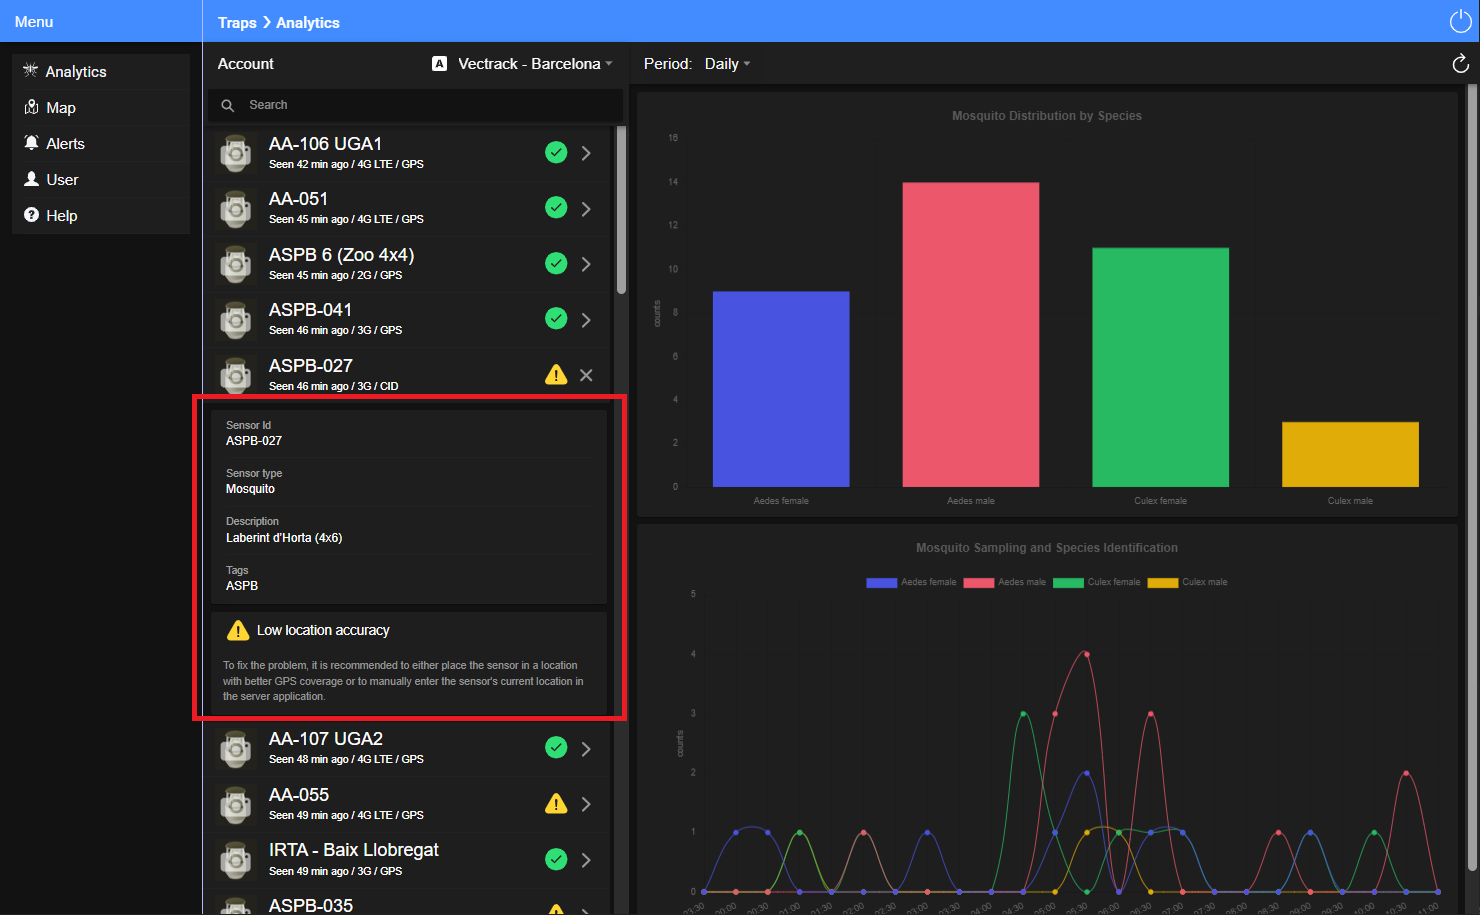
- Sensor Details and Quick Diagnosis: Provides detailed information, active alerts, and diagnostic recommendations for the selected sensor.
- Main Menu:
- Summary: Displays graphical summaries of mosquito capture activity across all deployed sensors in the selected account.
- Map: Displays the geographic location of all deployed sensors through an interactive map-based view.
- Alerts: Displays active and historical system alerts.
- User: Provides tools for managing user accounts, roles, permissions, and notification groups within the selected account.
- Help: Provides access to the user documentation and support resources.
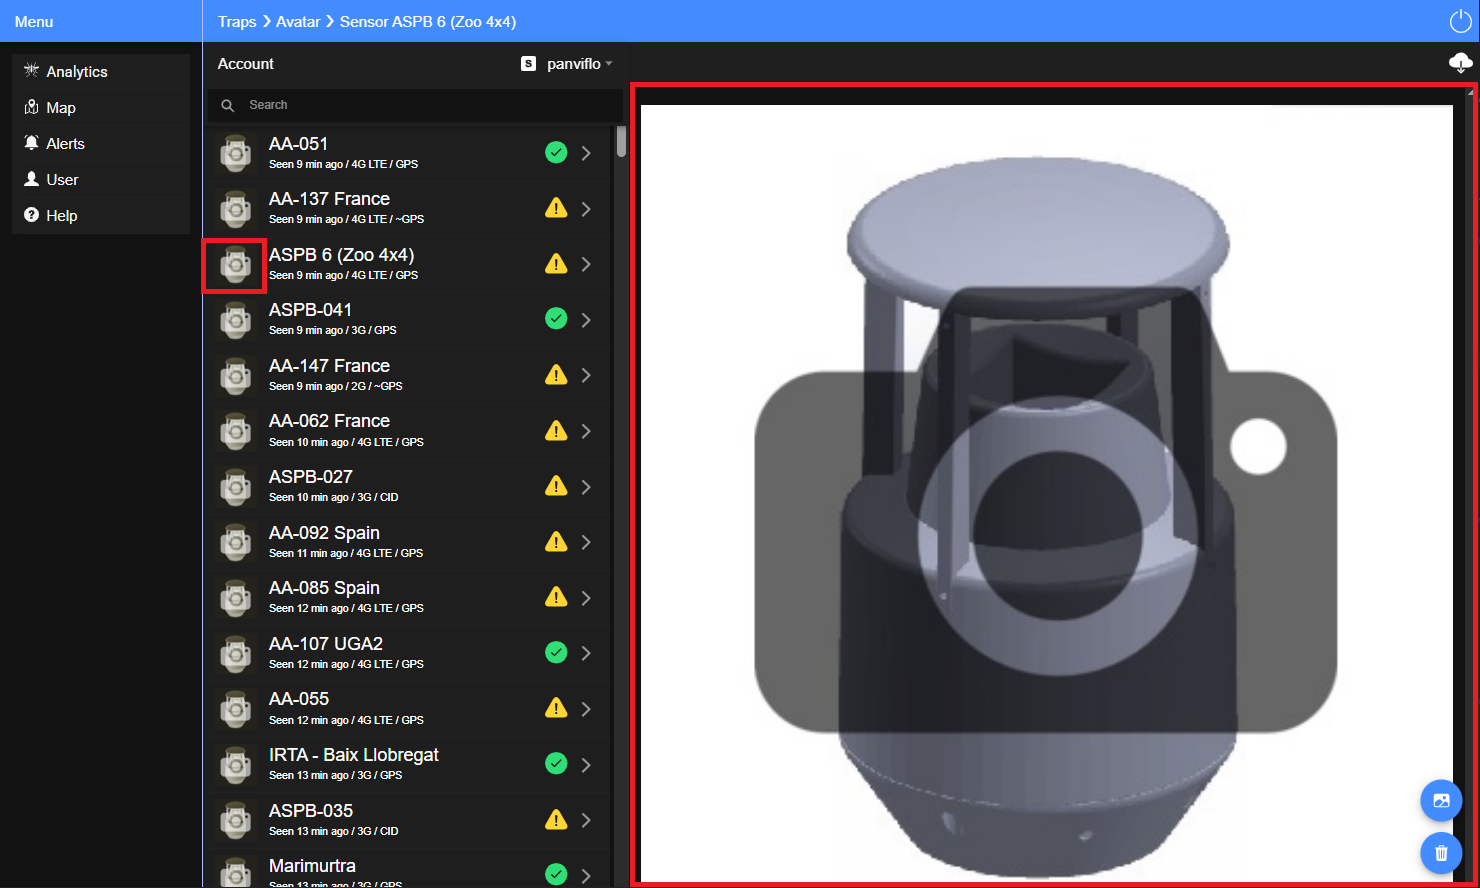
- Sensor Avatar: Displays and manages the avatar photo associated with the selected sensor.
Account / Project Selection Menu
Purpose
Allow users to switch between accounts and monitoring projects they have permission to access.
Description
The Account / Project Selection Menu allows users to change the active account or monitoring project within the SensViewer platform. The available options depend on the user's assigned role and permissions.
Key Components
- Dropdown Menu: Allows users to switch the active data context to any account or monitoring project they have permission to access.
- User Role Indicator: Displays the user's role within the selected account.
User Roles
- Organization (O): Account owner. Has full administrative privileges and can create Administrator and Guest accounts.
- Administrator (A): Has full permissions within assigned monitoring projects and can create Guest accounts.
- Guest (G): Has read-only access to the assigned account or monitoring projects.
Sensor List
Purpose
Provide a global view of sensor deployment and operational status.
Description
The Sensor List provides a centralized view of all deployed sensors, allowing users to monitor their operational status, connectivity, and location. Sensor status indicators help users quickly identify and manage sensor activity.
Key Components
- Sensor List:
- Displays each sensor's ID (for example, ASPB 6 or AA-068-MHC).
- Shows the last communication time ("Seen X min ago"), data connection type, and location source information.
- Data Connection Type: Indicates the network technology used by the sensor, such as 4G, 3G, 2G, or Wi-Fi.
- Location Source: Indicates how the sensor location was obtained:
- GPS: Location provided by the device's GPS receiver.
- CID (Cell ID): Location estimated using cellular network information.
- ~GPS: Approximate location provided by the server when GPS coordinates are not available.
- Quick Search: Allows users to quickly locate sensors by entering a partial sensor ID (for example, "AA-06").
- Status Indicators:
- 🟢 Green: Sensor is operating normally.
- 🟡 Yellow: Sensor has a minor alert (for example, weak signal).
- 🔴 Red: Sensor has been disconnected from the server for more than one hour or is experiencing a critical failure.
- Decommission Rule: Sensors that remain in the Red state for more than 90 days are automatically removed from the active sensor list.
Sensor Details & Quick Diagnosis Expandable Panel
Purpose
Provide detailed sensor information, operational status, and diagnostic guidance to help identify and resolve potential issues.
Description
The Sensor Details and Quick Diagnosis expandable panel provides detailed information about the selected sensor, including its metadata, operational status, and active alerts. It also displays diagnostic messages together with recommended corrective actions to help users quickly identify and resolve potential issues.
Access
Open the expandable panel by double-clicking a sensor in the Sensor List.
Key Components
- Sensor Metadata: Displays information such as the Sensor ID and Sensor Type (for example, Mosquito).
- Proactive Alerts: Displays active alerts (for example, "Mobile signal (RSSI) very low") together with recommended corrective actions, such as relocating the sensor to improve signal strength.
Analytics Panel
Purpose
Provide graphical analytics of mosquito capture activity within the selected account.
Description
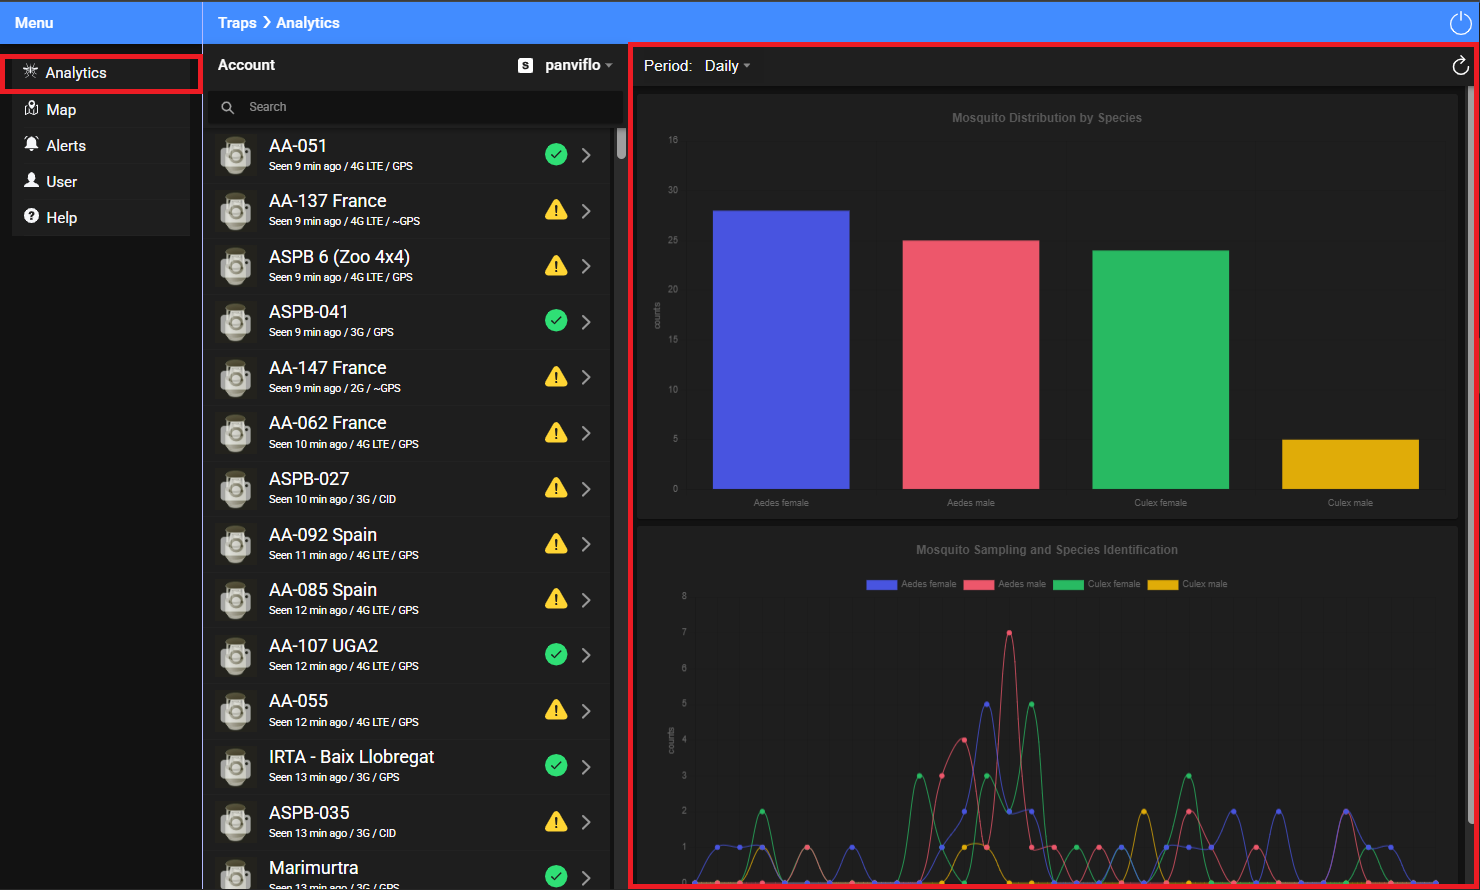
The Analytics Panel provides visual analytics of mosquito capture activity collected by all deployed sensors in the selected account. It includes a bar chart showing the total number of captured mosquitoes by species and a timeline chart showing capture trends over time, helping users monitor mosquito populations and identify temporal patterns.
Access
Open the Analytics Panel by selecting Analytics from the main menu.
Key Components
- Species Capture Chart: Displays a bar chart showing the total number of mosquitoes captured for each species by all deployed sensors in the selected account.
- Capture Timeline: Displays the number of captured mosquitoes by species over time, allowing users to analyze capture trends.
- Panel Controls: Allow users to:
- Select the displayed time range (Daily or Monthly).
- Refresh the displayed statistics.
Map Panel
Purpose
Provide a geographical view of active sensor deployments.
Description
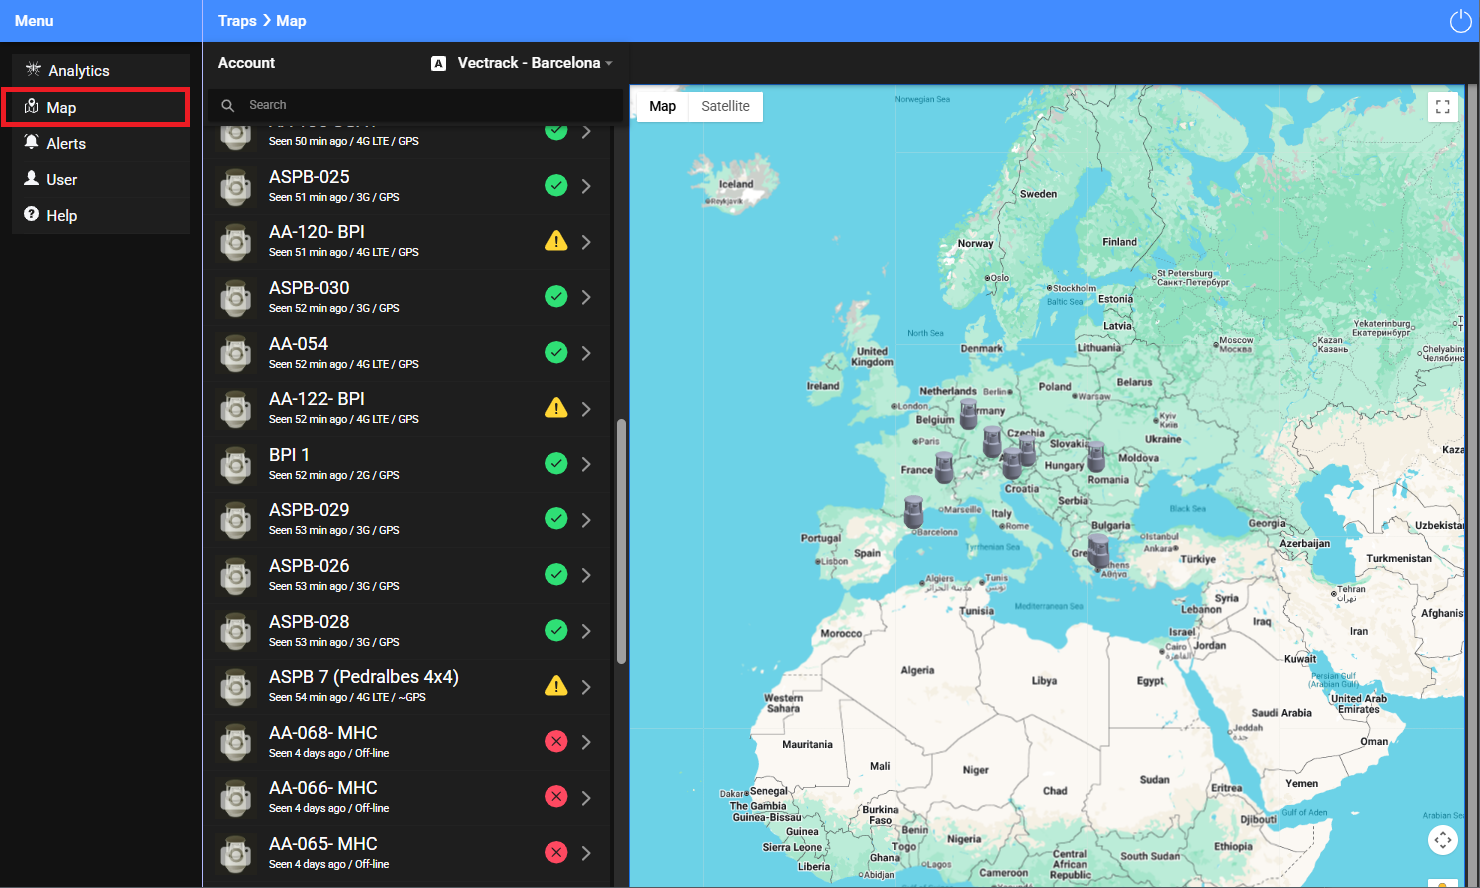
The Map Panel shows the geographic location of active sensors, allowing users to visualize deployments and quickly identify their distribution across the monitored area.
Access
Open the Map Display by selecting Map from the main menu.
Key Components
- Sensor Markers: Displays the location of all active sensors on the map.
- Sensor Identification: When multiple sensors are displayed in the same area, hover the pointer over a sensor marker to display the sensor name.
- Navigation: Use the standard map controls to zoom and navigate across the monitored area.
Alerts Panel
Purpose
Provide a centralized view of active and historical system alerts.
Description
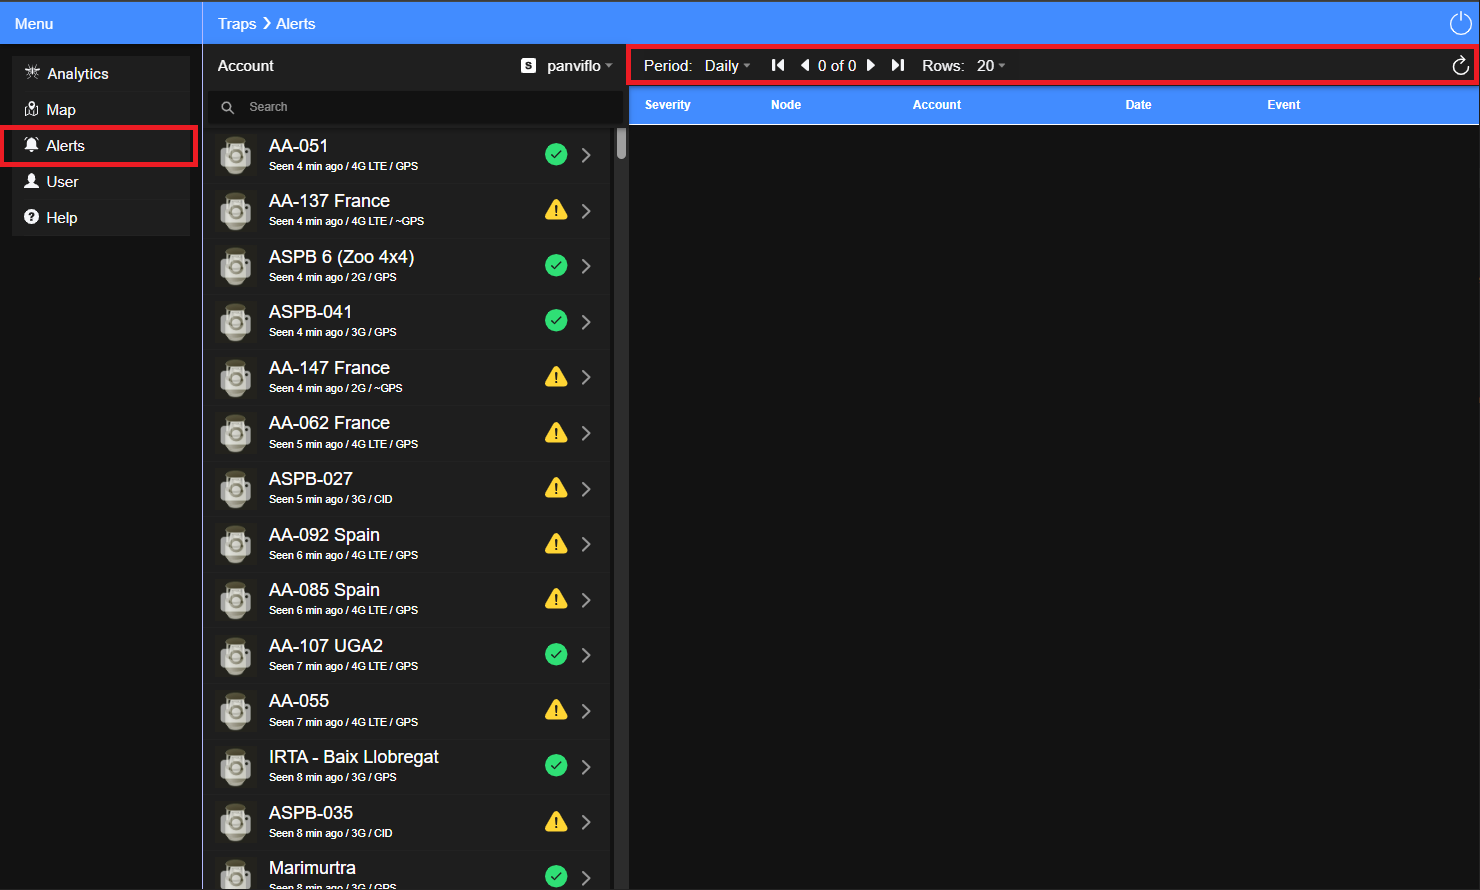
The Alerts Panel provides a unified view of active and historical alerts across the system. It allows users to monitor sensor events, review alert details, and support efficient system monitoring.
Access
Open the Alerts Panel by selecting Alerts from the main menu.
Key Components
- Alert List: Displays active and historical alerts organized by Severity, Node, and Event.
- Console Controls: Allow users to:
- Select the displayed time range (Daily or Monthly).
- Adjust the number of displayed events.
- Refresh the alert list.
Related Features
- Alert Configuration: Alert conditions and notification settings are configured through the Sensor Data Screen.
- Telegram Notifications: Telegram notifications are managed through the User Screen. Alerts are delivered when the user is subscribed to the Telegram group associated with the selected account.
Sensor Avatar Panel
Purpose
Provide visual verification of the sensor's physical deployment and surrounding environment to support maintenance and inventory management.
Description
The Sensor Avatar panel displays the current avatar photo of the selected sensor at its deployment location. It enables users to verify the installation site, identify the device, and assess the surrounding environment during maintenance and routine operations. The panel also provides an enlarged image preview and allows users to upload a new avatar photo or remove the current one.
Access
Open the panel by clicking a sensor's avatar in the Sensor List.
Key Components
- Avatar Photo: Displays the current avatar photo associated with the selected sensor.
- Image Preview: Displays an enlarged view of the avatar photo for improved visibility and inspection.
- Upload Image: Click the Image icon to select and upload a new avatar photo from the local file system.
- Remove Avatar: Click the Trash icon to remove the current avatar photo.